
Overview
The Meeting Panel is where you actively monitor and manage attendance during a live Zoom meeting. It’s designed for quick visual scanning and real-time decisions as the meeting happens.
The Four Operating Tabs
Section titled “The Four Operating Tabs”AttendFlow provides four tabs for different aspects of attendance monitoring:
1. Auto Attendance (Default Tab)
Section titled “1. Auto Attendance (Default Tab)”Purpose: Monitor live statuses of all participants at a glance.
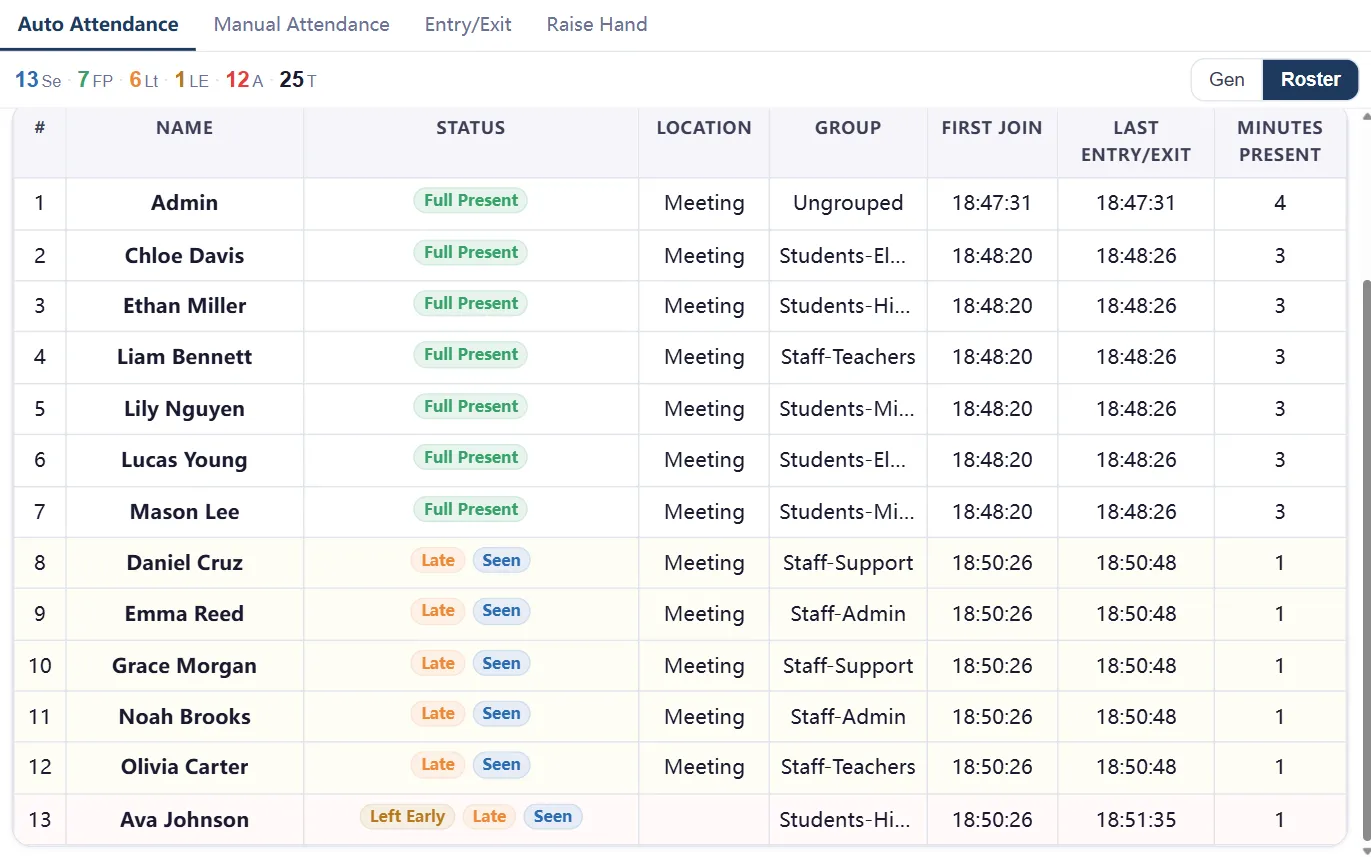 Auto Attendance tab showing participant statuses
- Real-time table showing participant names and current statuses (Full Present, Late, Absent, Left early, Returned, Guest, Unmatched).
- Color-coded status chips for quick visual scanning.
- Summary counts at the top (e.g., “45 Full Present, 2 Late, 5 Absent”).
- Filterable by status type, group, or search by name (and pinyin).
When to use: During the meeting. Check this tab regularly to:
- Verify expected attendees have arrived.
- Catch late arrivals and take action if needed.
- Spot unexpected guests or Name Matching issues.
- Monitor who left early before the meeting ends.
Learn more: Auto Attendance Tab
2. Manual Attendance (Checkpoint Tab)
Section titled “2. Manual Attendance (Checkpoint Tab)”Purpose: Capture manual records at specific moments (e.g., roll call, check-in time, discussion breakout).
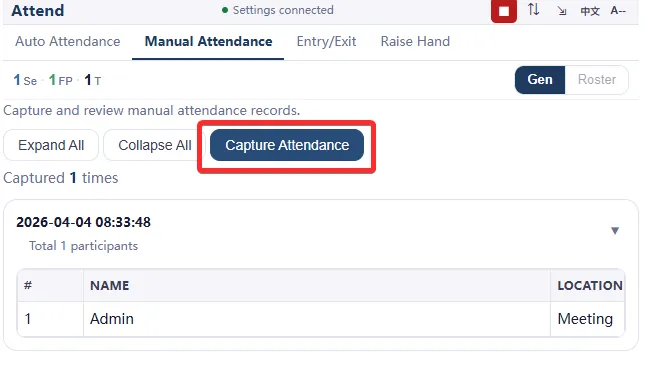 Manual Attendance tab showing capture button
- “Capture Attendance” button to capture the state of all participants at that instant.
- Manual Attendance Records are time-stamped and saved to the Attendance Record.
- Multiple manual captures per meeting are allowed.
When to use: During the meeting, at key moments:
- Starting roll call: Take a manual record to mark official attendance time.
- During breakouts: Capture who’s in each breakout at a specific moment.
- After questions: Take a manual record to capture participation after a key discussion point.
- Before break: Lock in attendance before an extended break.
Learn more: Manual Attendance Tab
3. Entry/Exit (Timeline Tab)
Section titled “3. Entry/Exit (Timeline Tab)”Purpose: See the exact chronological sequence of when people joined and left (meeting or waiting room).
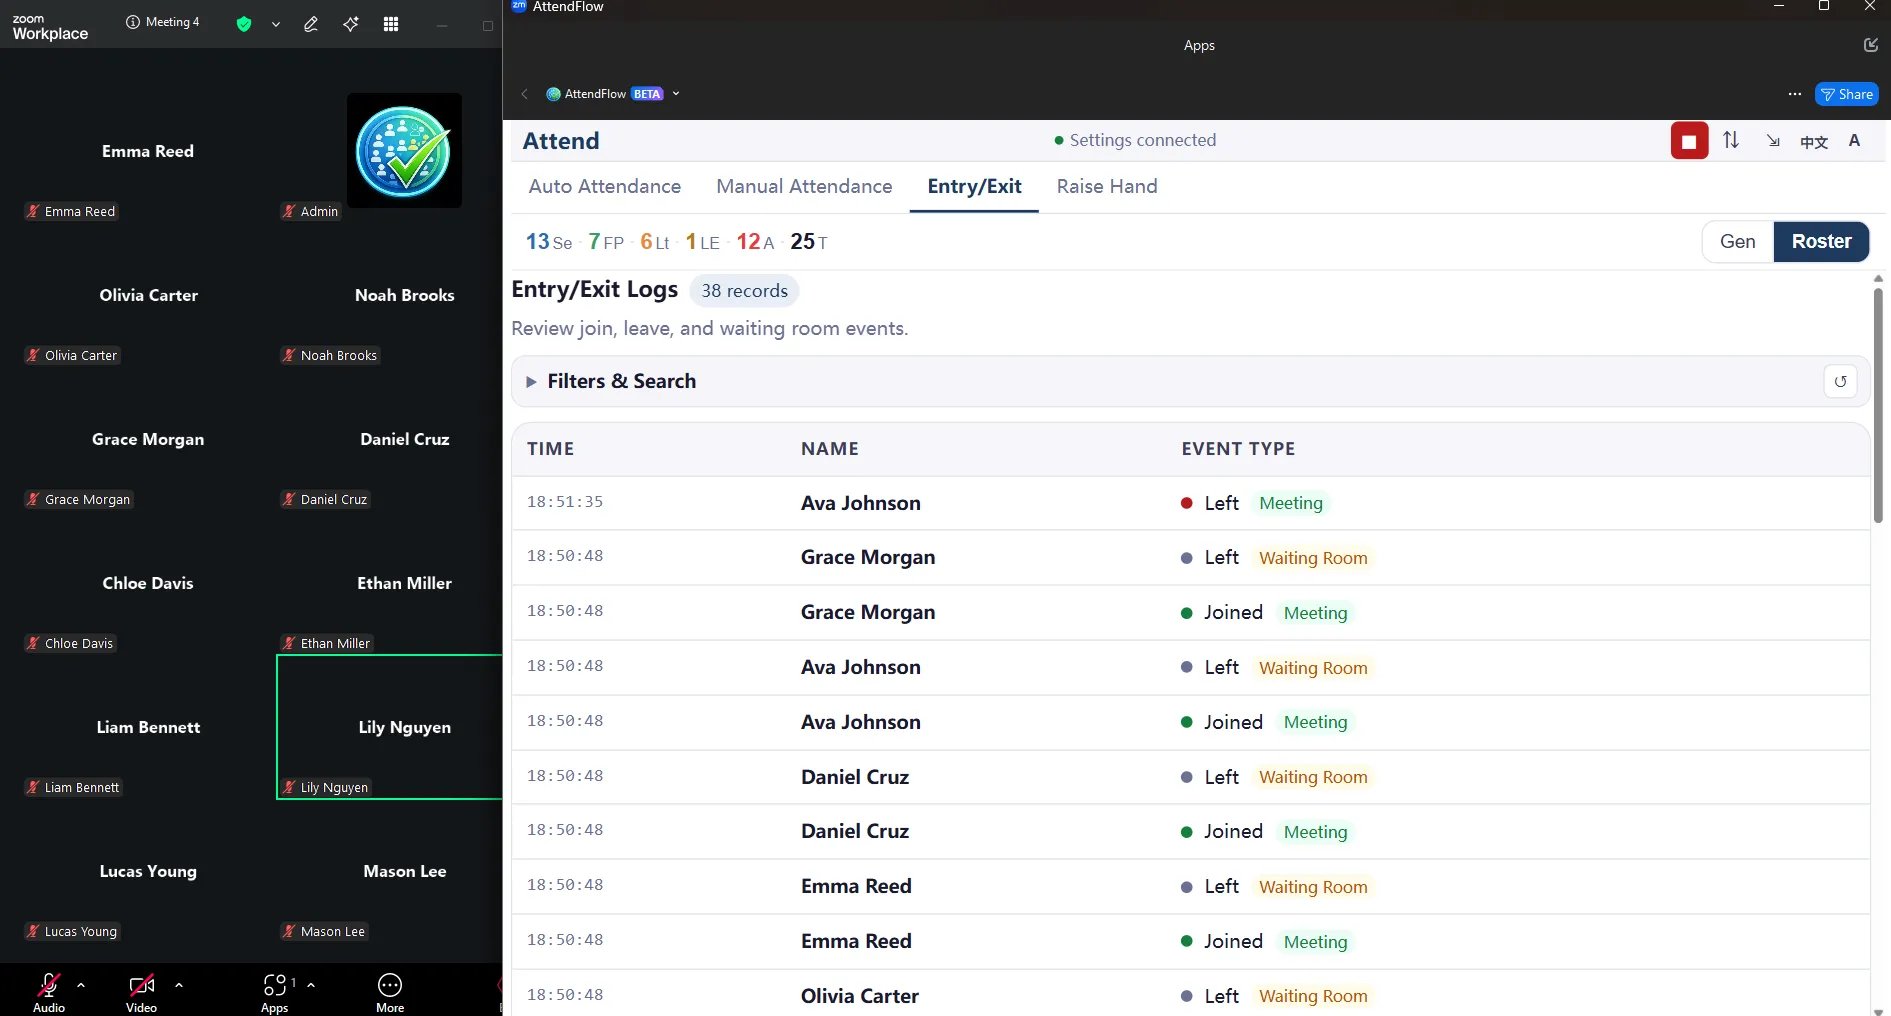 Entry/Exit tab showing join/leave events
- Scrollable timeline of all join/leave/re-join events.
- Timestamps for each event (useful for verifying exact arrival time).
- Shows the complete meeting history from start to end.
When to use: During or after the meeting:
- During: If you need to verify exact join times (e.g., “Did they arrive before or after 2:05pm?”).
- After: For follow-up or reconciliation (e.g., “When exactly did person X leave?”).
Learn more: Entry/Exit Tab
4. Raise Hand (Participation Tab)
Section titled “4. Raise Hand (Participation Tab)”Purpose: Track who raised their hands during the meeting.
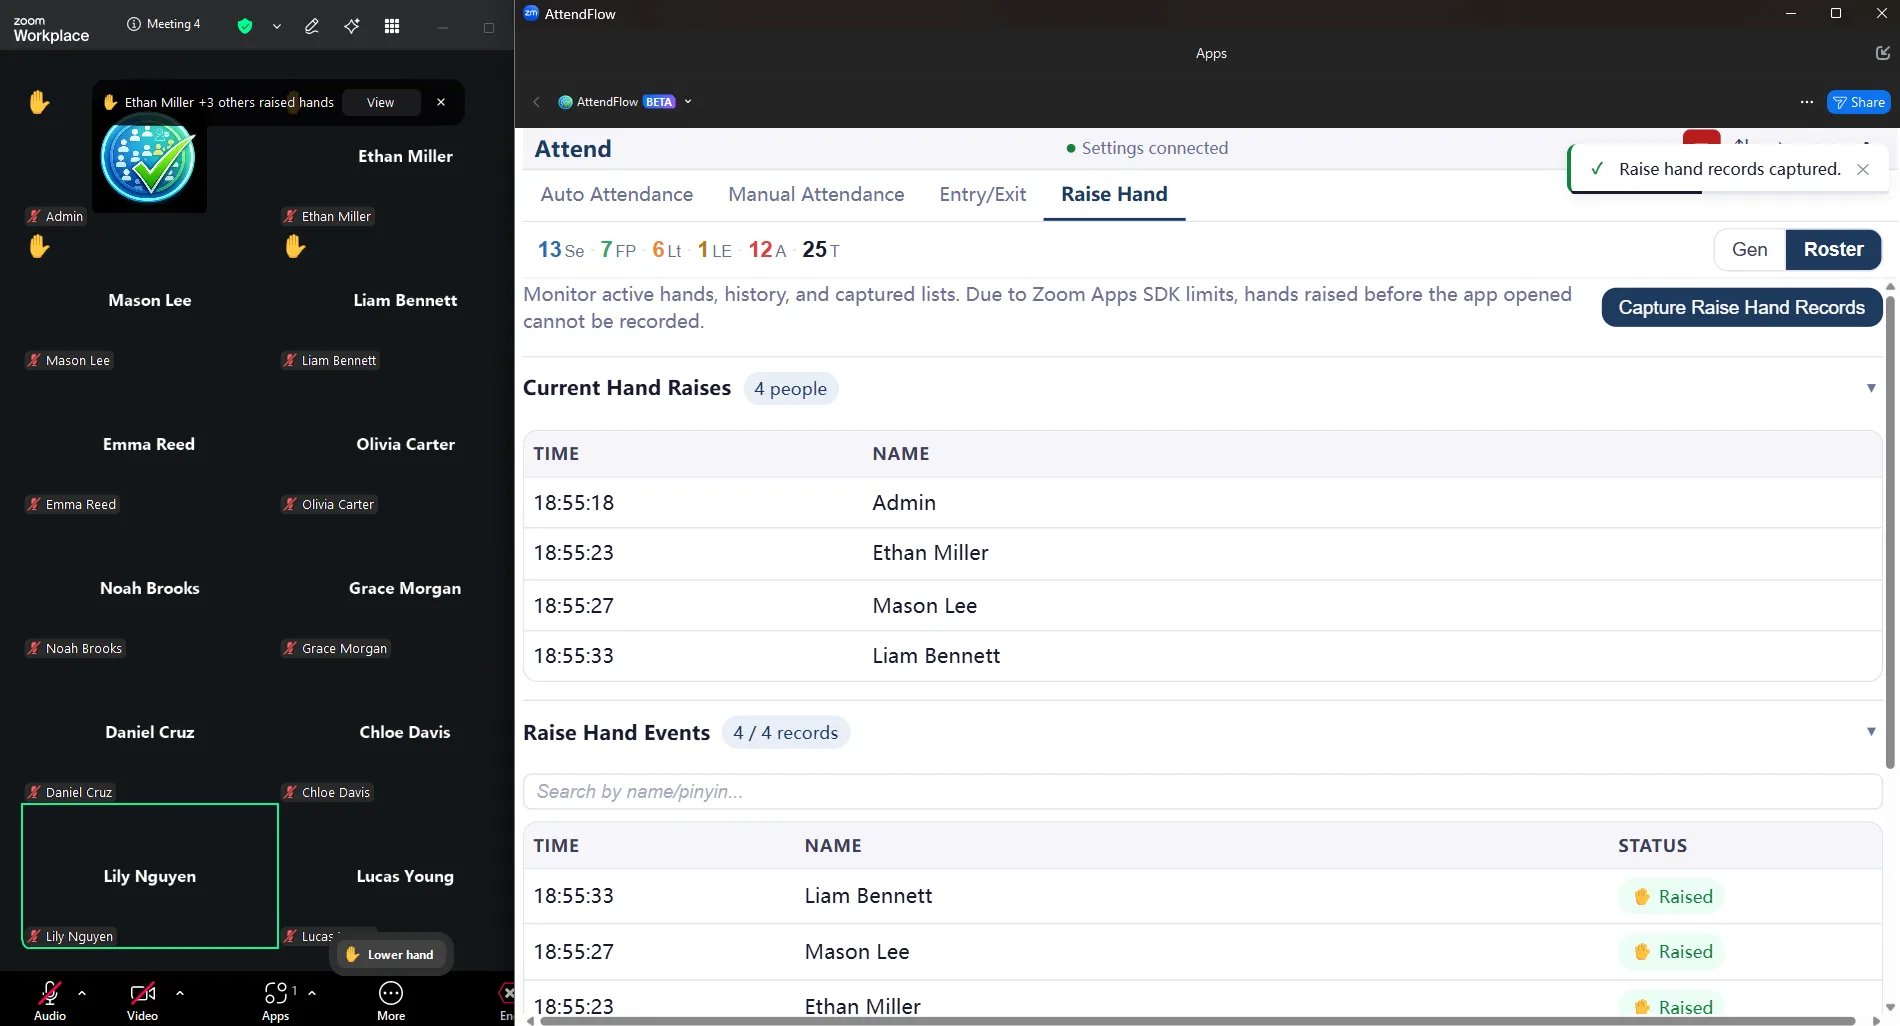 Raise Hand tab showing raised hand events
- Log of all raised hand events with timestamps.
- Useful if engagement or participation counts matter for your records.
When to use: During or after the meeting:
- During: If you’re tracking speaker turn-taking or question engagement.
- After: For analysis of participation patterns or engagement metrics.
Learn more: Raise Hand Tab
Typical Meeting Operator Routine
Section titled “Typical Meeting Operator Routine”Here’s how a typical meeting flows:
-
Before meeting: Do any needed Roster or Attendance Profile setup in Settings Panel beforehand.
-
At meeting start:
- Launch AttendFlow in the meeting (Apps > AttendFlow).
- Confirm the Auto Attendance tab shows participants as they join.
-
During meeting:
- Keep Auto Attendance tab visible for live monitoring. Watch for late arrivals (status = “Late”), absent attendees (status = “Absent”), or unmatched names (status = “Unmatched”).
- Capture attendance records if you have scheduled check-in times (e.g., at 2:00pm, at break time, etc.). Click Manual Attendance > Capture Attendance.
- Monitor Raise Hand events if you’re tracking participation engagement. Glance at the Raise Hand tab occasionally.
- Reference Entry/Exit if you need to verify exact join/leave times.
-
Before meeting ends:
- Confirm all expected participants are accounted for. Check your Absent, Late, and Left Early counts.
- Take a final manual attendance record if you want to capture the true attendance-at-end state.
-
After meeting:
- Close AttendFlow and the meeting.
- Open Settings Panel > Attendance Records.
- Find your meeting record and export the records.
Troubleshooting Quick Links
Section titled “Troubleshooting Quick Links”Having an issue in the Meeting Panel?
- Recheck Install and Launch if you are missing tabs or do not appear to have host or co-host access.
- Use Other Settings if the panel size or export language defaults need adjustment.
- Use FAQ for short answers about permissions, exports, and sync behavior.
Related Links
Section titled “Related Links”- Auto Attendance Tab – Monitor live statuses.
- Manual Attendance Tab – Capture attendance checkpoints.
- Entry/Exit Tab – Review exact join/leave times.
- Raise Hand Tab – Track participation.
- Attendance Records – Review and export meeting results afterward.
- Settings Panel Overview – Manage data before/after meetings.
- First Meeting Quick Run – Try AttendFlow for the first time.