Install and Launch
Prerequisites
Section titled “Prerequisites”Before you install AttendFlow, make sure you have:
- A Zoom account with permission to install apps (usually Workspace Owner or Account Admin, or your personal Zoom account).
- A Zoom meeting to test with (or you can use a personal meeting room).
- Host or co-host role in the meeting (guest and participant roles cannot access all features).
Step 1 (method 1): Install AttendFlow from main website
Section titled “Step 1 (method 1): Install AttendFlow from main website”- Go to the AttendFlow app install page: https://app.attendflow.org/.
- Click the Install Zoom App button.
- You’ll be redirected to the app authorization page. Review the requested permissions.
- Click Authorize to approve and complete installation.
Step 1 (method 2): Install AttendFlow from Zoom Marketplace
Section titled “Step 1 (method 2): Install AttendFlow from Zoom Marketplace”- Go to Zoom App Marketplace.
- Sign in with your Zoom account (use the account that has app installation permissions).
- Search for “AttendFlow” in the marketplace search bar.
- Click on the AttendFlow listing to open the app details page.
- Click the Get Started button.
- You’ll see a permissions dialog. Review the requested permissions.
- Click Authorize to approve and complete installation.
The app is now installed in your Zoom workspace. All users in your workspace will have access to it.
Step 2: Launch in a Meeting (Meeting Panel)
Section titled “Step 2: Launch in a Meeting (Meeting Panel)”The Meeting Panel is where you monitor attendance during a live meeting.
-
Start or join a Zoom meeting as a host or co-host.
- If you’re a participant or guest, you won’t see AttendFlow controls.
- If you’re not yet in a meeting, you can start your personal meeting room or join a scheduled meeting.
-
Open the Apps panel in Zoom:
- Look for the Apps icon in the Zoom meeting toolbar (usually looks like a puzzle piece or grid).
- Click it to open the apps panel.
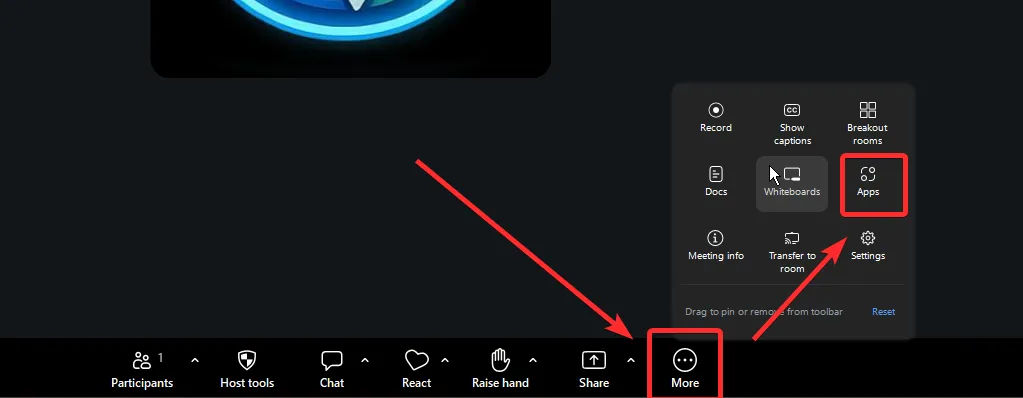 Zoom meeting toolbar with Apps icon highlighted
- Find and launch AttendFlow:
- Scroll through the apps list or search for “AttendFlow”.
- Click AttendFlow to launch it.
- The app will open in a side panel on the right side of your Zoom window.
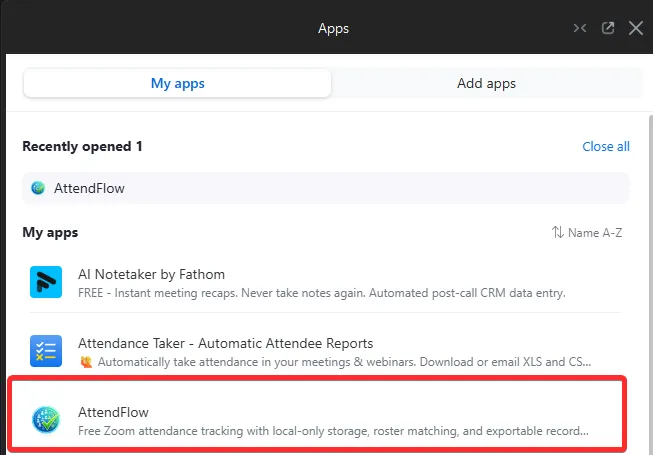 AttendFlow in Zoom meeting side panel
- Explore the Meeting Panel tabs:
- You should see several tabs at the top of the AttendFlow panel:
- Auto Attendance: Live participant status table.
- Manual Attendance: Take manual attendance records.
- Entry/Exit: Chronological timeline of joins and leaves.
- Raise Hand: Track raised hand events.
- Click through each tab to get familiar with the layout.
- You should see several tabs at the top of the AttendFlow panel:
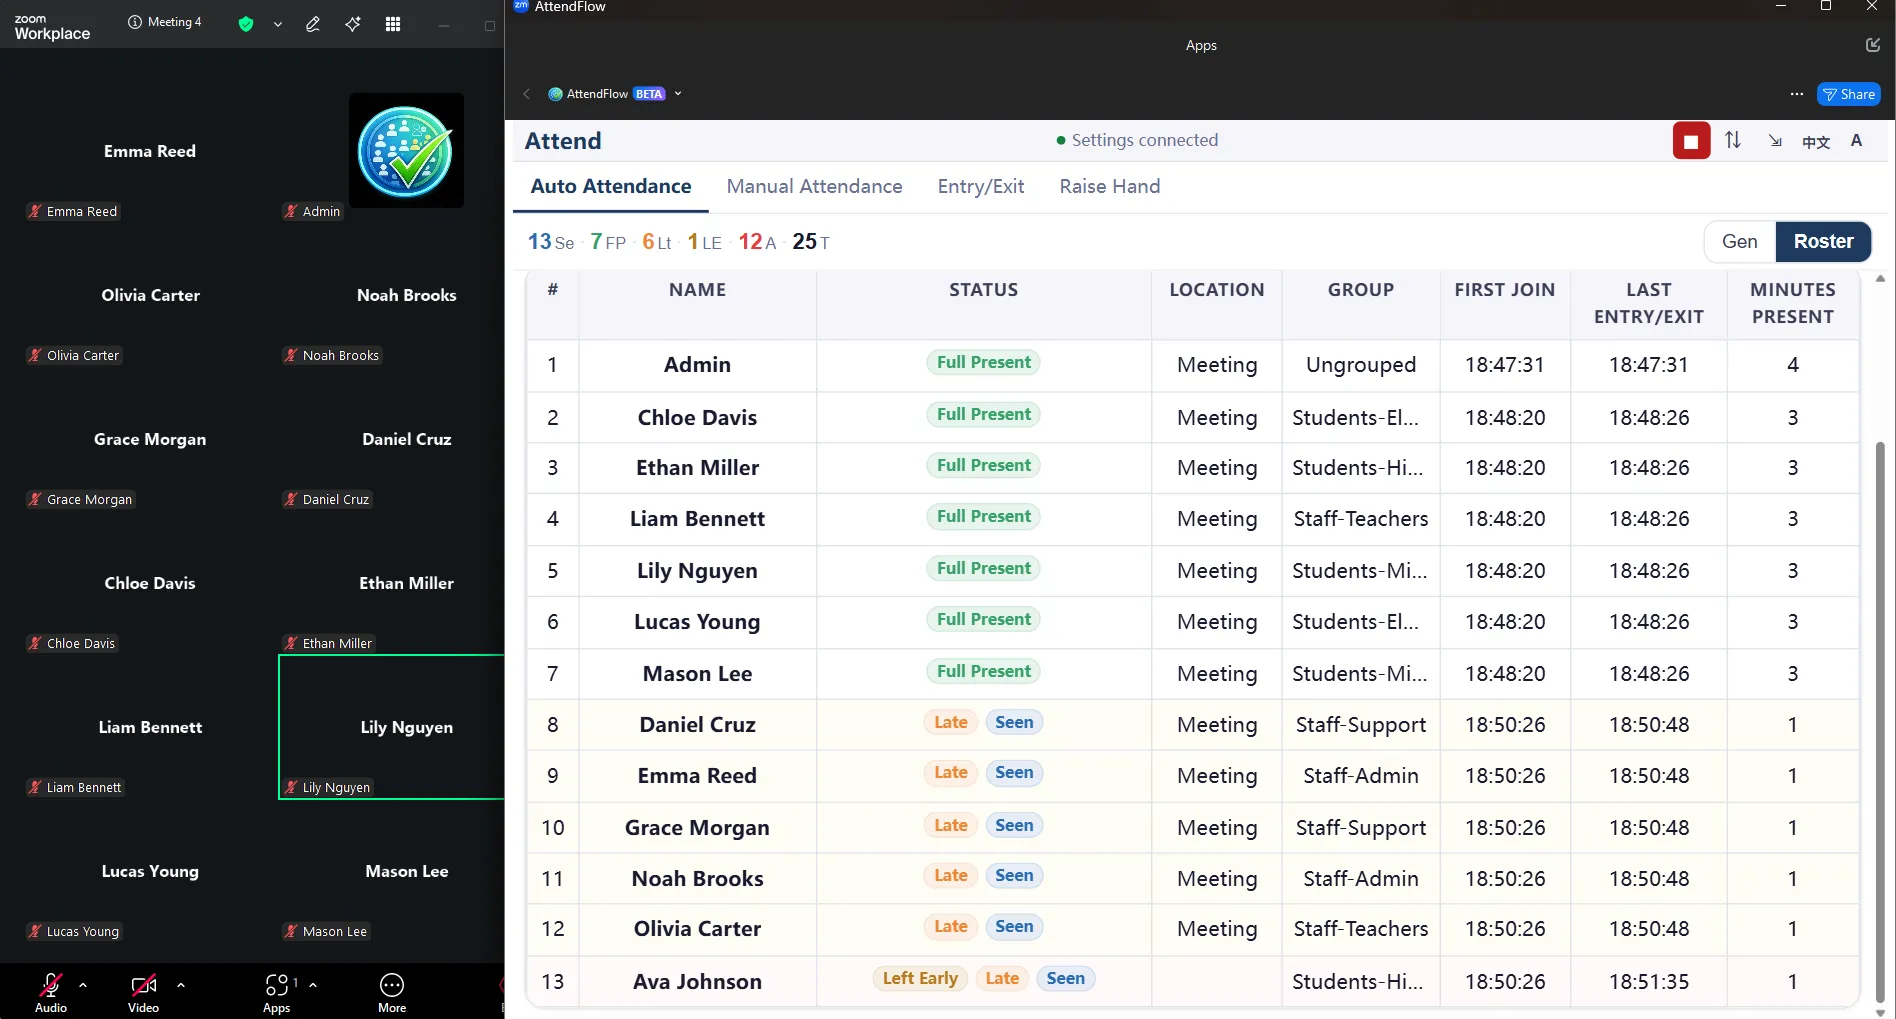 Meeting Panel (Zoom Meeting runtime)
- Close the app by clicking the X or closing the side panel when you’re done exploring.
Step 3: Launch in Settings Panel (Main Client)
Section titled “Step 3: Launch in Settings Panel (Main Client)”The Settings Panel is where you configure rosters, profiles, Name Matching, and export data. You access it from the Zoom Main Client app (outside of a meeting).
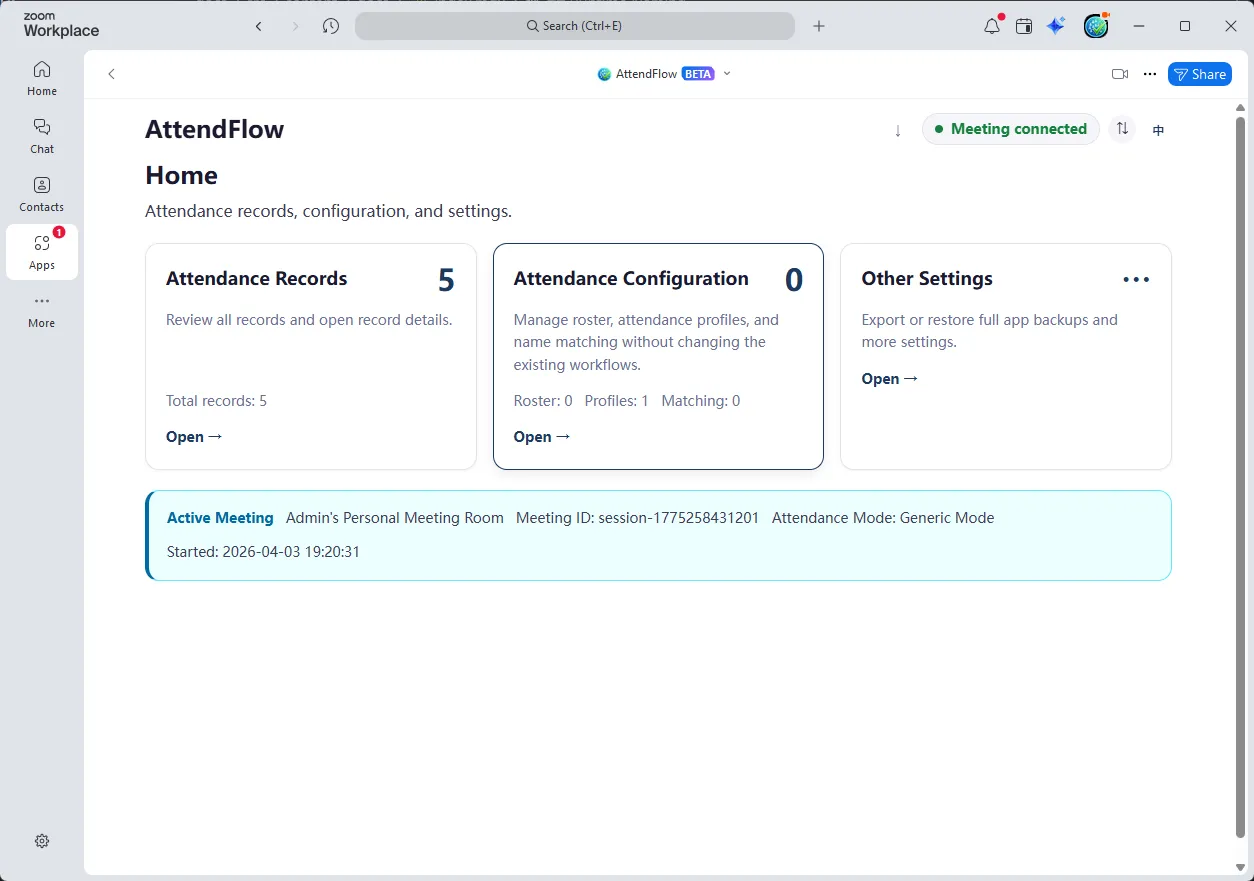 Settings Panel (Zoom Main Client runtime)
-
Open the Zoom Main Client app on your desktop (not during a meeting).
- This is the main Zoom application window, not the web browser.
-
Click the AttendFlow icon or menu:
- In the Zoom Main Client, look for AttendFlow in the app menu or dock.
- Depending on your version, it may appear as an icon, in the left sidebar, or in a dropdown menu.
- Click it to open the Settings Panel.
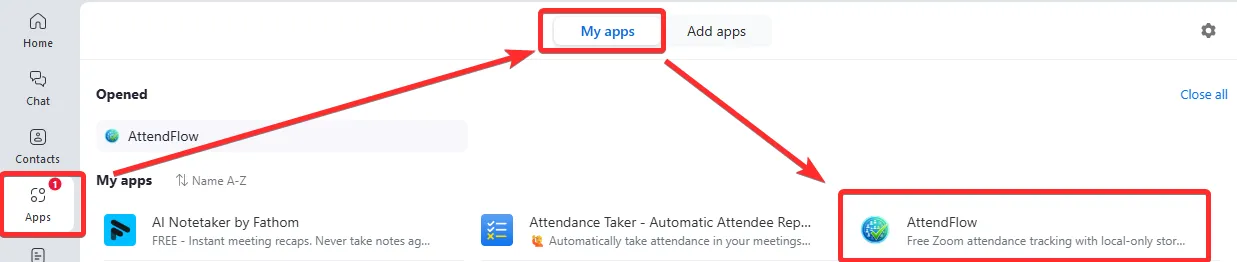 AttendFlow in Zoom Main Client (Settings Panel)
- Explore the Settings Panel sections:
- Attendance Records: Browse and export past attendance records.
- Attendance Configuration
- Roster Management: Import and manage your roster.
- Attendance Profiles: Create profiles with attendance rules (late threshold, return window).
- Name Matching: Map Zoom display names to roster names.
- Sync Review (if applicable): Review pending synced data from meetings.
- Other Settings: Configure language, export format, UI size, filter defaults, backups, and other defaults.
Step 4: Verify Your Role and Permissions
Section titled “Step 4: Verify Your Role and Permissions”AttendFlow requires specific roles to access all features.
Required Role
Section titled “Required Role”- Host or co-host: Full access to all Meeting Panel tabs and export functions.
- Participant or guest: No access to live Meeting Panel controls. You can still open the Settings Panel later to review or export records that already synced.
Step 5: Adjust Settings (Optional)
Section titled “Step 5: Adjust Settings (Optional)”Before your first real meeting, you may want to configure:
- UI Language: Chinese or English (see Global Settings).
- UI Size: Adjust the zoom/scaling if text is too small or large (see Global Settings).
- Export Language: CSV header language (see Global Settings).
These settings are one-time configurations that apply to all future meetings.
Alternatively, adjust Meeting Panel UI language and UI size directly on the top right corner of the Meeting Panel for a quick change during meetings.
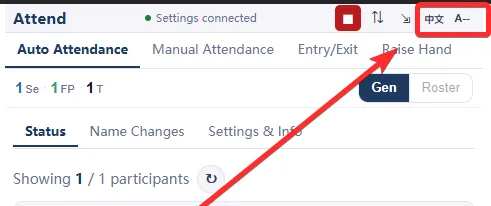 Quick settings for UI language and size in Meeting Panel
Settings Panel language can also be changed from top right corner. Settings Panel sizing still needs to be changed in Other Settings.
Troubleshooting Installation
Section titled “Troubleshooting Installation”App doesn’t appear in the Apps list
Section titled “App doesn’t appear in the Apps list”- Solution 1: Refresh the Zoom meeting or the Zoom app. Exit and re-enter the meeting.
- Solution 2: Verify that the app is installed in your workspace (check the Zoom Marketplace “My Apps” section).
Permission denied messages
Section titled “Permission denied messages”.BBDGyxCV_Z2wJ1t.webp) Limited Mode when user is not host or co-host
Limited Mode when user is not host or co-host
- Solution: Make sure your Zoom account role is host or co-host, not participant or guest.
UI is too small
Section titled “UI is too small”- Solution: Go to Global Settings and adjust the Meeting UI Size.
Next Steps
Section titled “Next Steps”Once installation and launch are verified:
- Go to Global Settings to configure language and UI preferences.
- Go to Key Concepts to understand core terms.
- Go to First Meeting Quick Run to complete your first meeting end-to-end.
Related Links
Section titled “Related Links”- Global Settings – Configure language and UI.
- Support – Contact support for any other issues.