First Meeting Quick Run
This guide walks you through a complete first-time experience: launching AttendFlow, monitoring attendance during a meeting, and exporting your first Attendance Records.
Before You Start
Section titled “Before You Start”Make sure you have:
- AttendFlow installed (see Install and Launch).
- A Zoom meeting ready (either start a personal meeting room or join a scheduled meeting where you’re host or co-host).
Part 1: Launch During a Meeting
Section titled “Part 1: Launch During a Meeting”-
Start or join a Zoom meeting as a host or co-host.
- You need host/co-host role to access all features. Participant or guest roles won’t work.
-
Open the Apps panel:
- In the Zoom meeting toolbar (bottom of screen), find the Apps icon.
- Click it to open the apps panel.
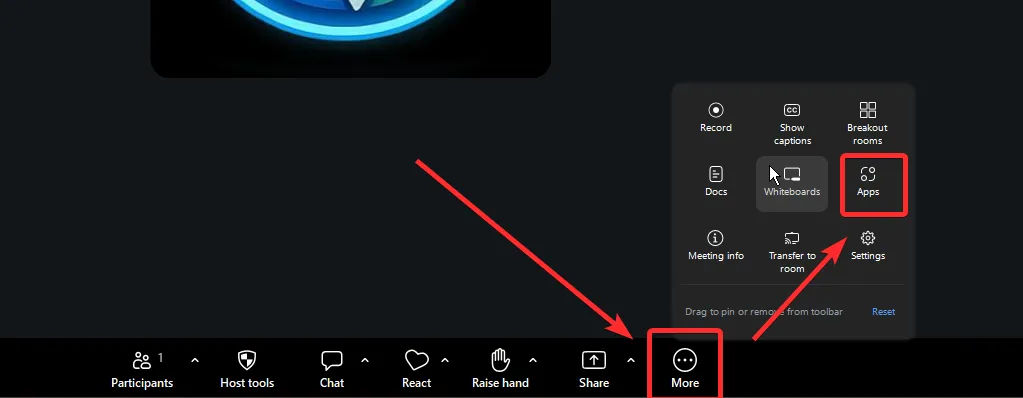 Zoom meeting toolbar with Apps icon highlighted
- Launch AttendFlow:
- Scroll through or search for “AttendFlow”.
- Click “AttendFlow” to launch it.
- The app opens in a side panel on the right side of your meeting window.
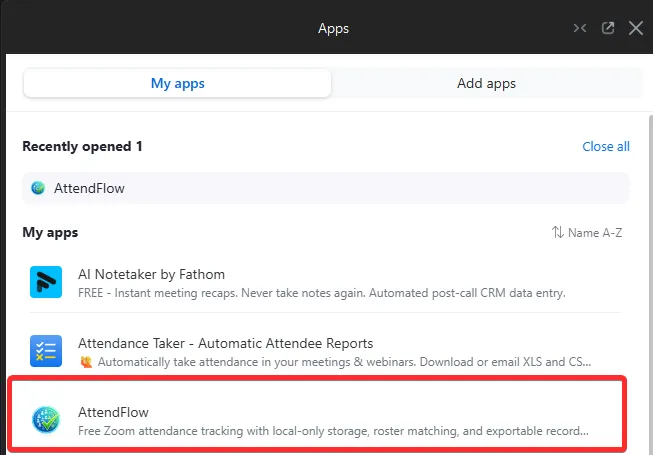 AttendFlow in Zoom meeting side panel
- Verify you can see the four tabs:
- At the top of the AttendFlow panel, you should see four tabs:
- Auto Attendance – Live participant status table.
- Manual Attendance – Capture Attendance checkpoints.
- Entry/Exit – Chronological join/leave timeline.
- Raise Hand – Raised hand events.
- If you do not see these tabs, confirm that you are host or co-host and relaunch the app. See Install and Launch if you need to recheck role or launch steps.
- At the top of the AttendFlow panel, you should see four tabs:
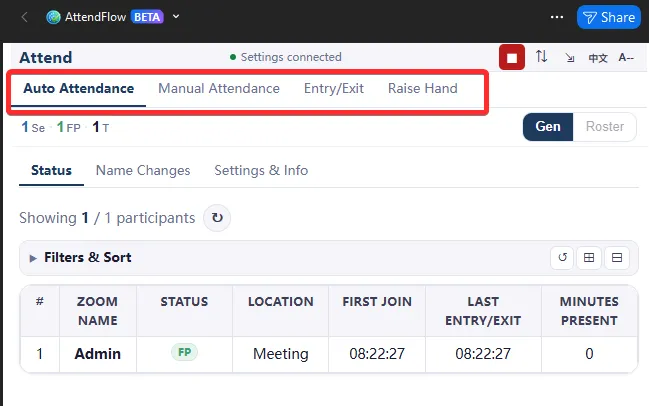 AttendFlow Meeting Panel tabs
- Keep the app open as you run the meeting.
Part 2: Monitor Live Attendance
Section titled “Part 2: Monitor Live Attendance”- Click on the Auto Attendance tab (should be open by default).
- You’ll see a table of participants currently in the meeting.
- Each row shows a participant name, their current status (Present, Late,etc.), location (Meeting or Waiting Room), join time, last entry/exit time, and present duration.
- This table updates in real time as participants join, leave, or change status.
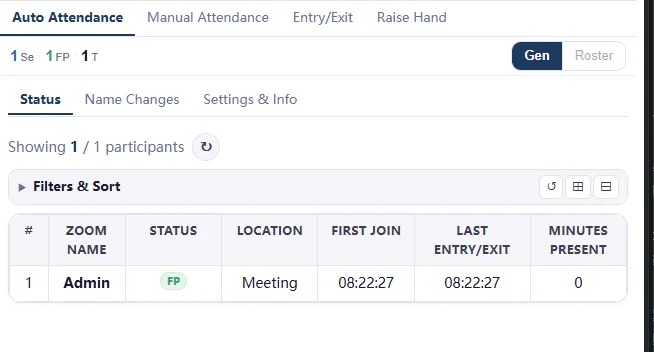 Meeting status table, Generic Mode (no roster)
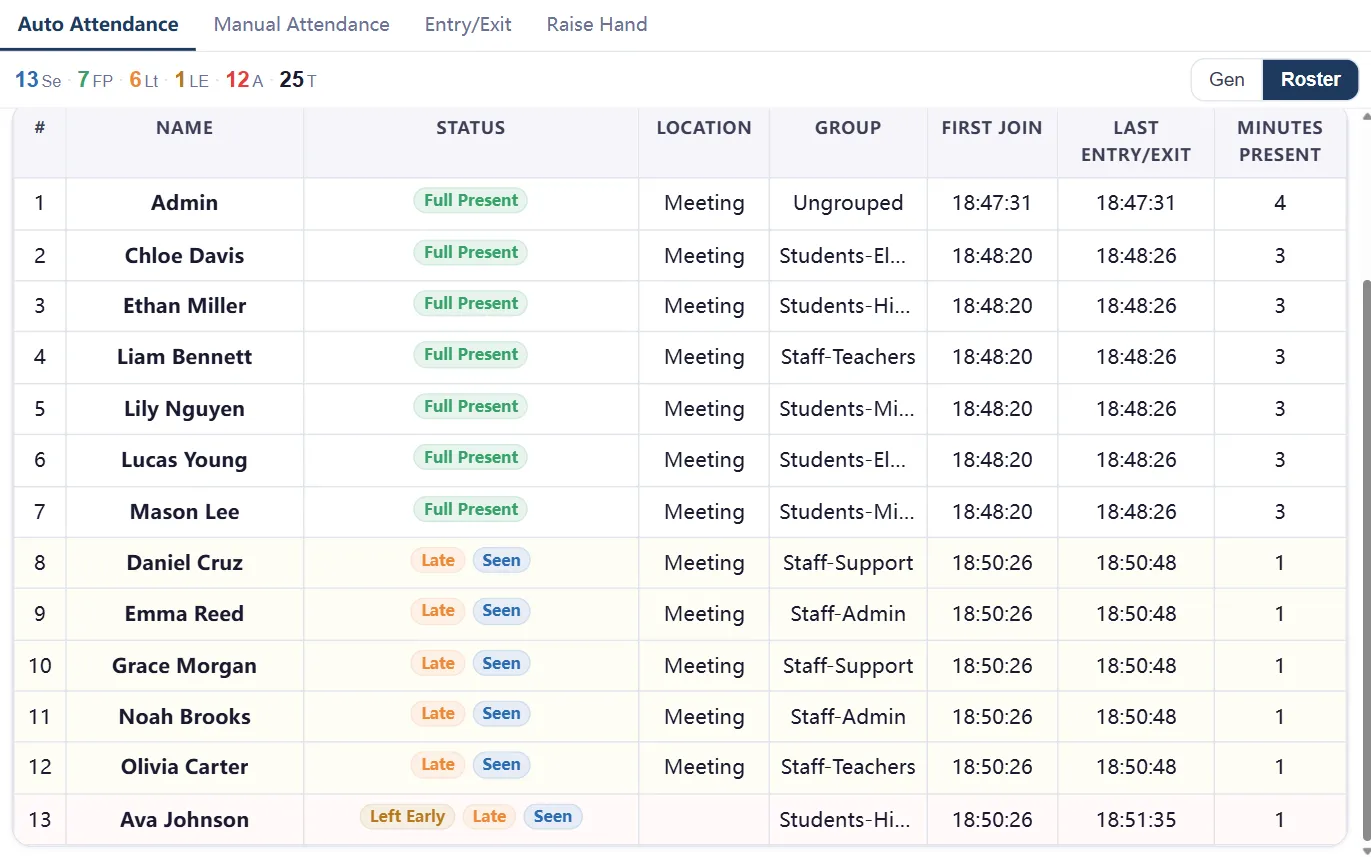 Meeting status table, Roster Mode
-
Invite or wait for participants to join:
- Simulate a real meeting by waiting a few minutes, or ask colleagues to join.
- Watch the participant list update in real-time as people join.
- Notice that as participants appear, their status updates automatically.
-
Take note of statuses:
- Full Present: Currently in the meeting and not late.
- Late: Joined after you set a late threshold (you can customize in the Settings & Info tab per meeting, or create an Attendance Profile for defaults).
- Left Early: Was in the meeting but has left.
- Seen: Participant has been in the meeting at some point (even if currently absent).
In addition, you’ll see these statuses in Roster Mode:
- Absent: Expected but never appeared (only visible in Roster Mode).
A participant can have multiple statuses at once (e.g., Seen and Late if they joined late but are currently in the meeting). The app calculates these based on your roster, attendance profile, and live data.
-
At the top, you will see summary counts for statuses such as Full Present, Late, Left Early, and more. This gives you a quick snapshot of attendance at any moment. Click a status count to filter the table to just those participants.
-
Optionally, take a manual attendance record:
- Click the Manual Attendance tab.
- Click “Capture Attendance” at a specific moment (e.g., during a roll call or key segment of the meeting).
- The app captures the state of all participants at that exact time.
- You can take multiple manual attendance records throughout the meeting.
- These records are saved and can be exported separately from the main attendance record, which captures the full timeline.
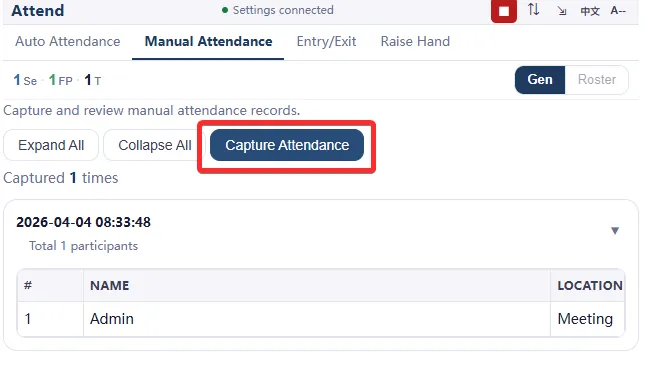 Manual Attendance tab with “Capture Attendance” button
Part 3: Explore Other Tabs
Section titled “Part 3: Explore Other Tabs”While the meeting is still running:
-
Entry/Exit tab:
- Shows a chronological list of all joins and leaves.
- Useful for seeing when people arrived (for verifying late arrivals) or left (for verifying early departures).
-
Raise Hand tab:
- Shows any participants who raised their hands during the meeting.
- Useful if tracking participation or engagement matters for your records.
Part 4: Export After the Meeting
Section titled “Part 4: Export After the Meeting”Once the meeting ends and you’re ready to view the attendance data:
- Open the Settings Panel:
- Exit the meeting.
- Open the Zoom Main Client application (the desktop app, not a web browser).
- This could be in your system tray.
- Open AttendFlow from the Apps section.
- You should see the Settings Panel interface.
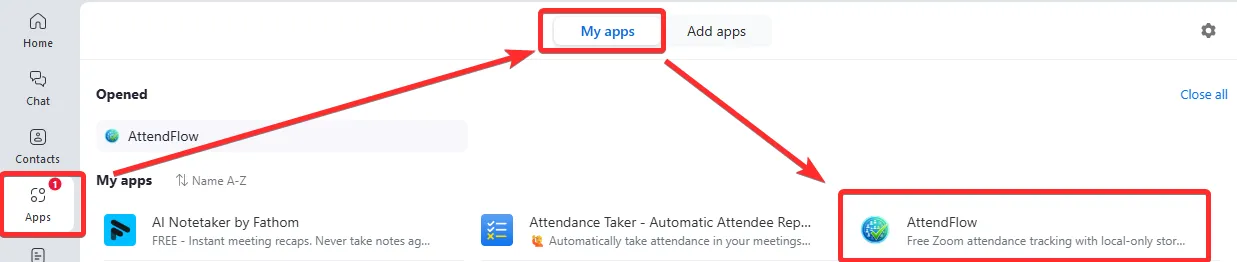 AttendFlow in Zoom Main Client (Settings Panel)
- Navigate to Attendance Records:
- Click “Attendance Records”.
- You’ll see a list of past meeting records, with the most recent one at the top.
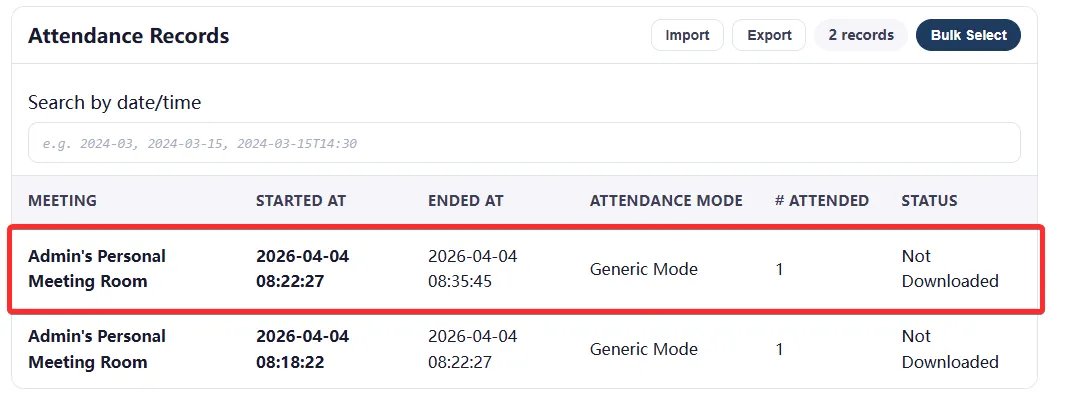 Attendance Records list in Settings Panel
- Find your meeting record:
- Look for the meeting you just completed. It should show:
- Meeting Topic
- Start time.
- End time.
- Attendance Mode (Generic or Roster).
- Number of participants (“Seen” status).
- Status (whether you have downloaded the record; or if the meeting is still in progress).
- Click on it to show details.
- Look for the meeting you just completed. It should show:
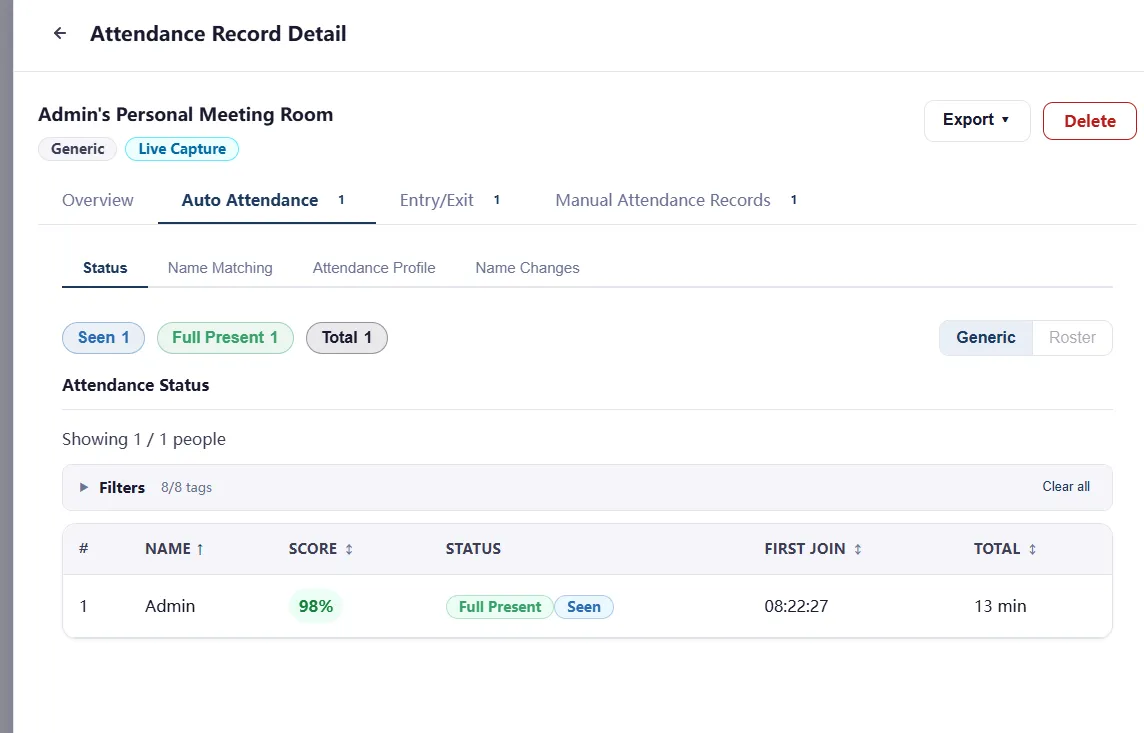 Detail view of an attendance record
-
Export options:
- Once selected, you’ll see export buttons or actions. You can export in multiple formats:
- JSON: Machine-readable, includes full timeline and metadata. Good for backup or import again in the future.
- CSV: Spreadsheet-ready format. Good for sharing, compliance reports, or analysis.
- Manual attendance records (if you took any): Separate CSV of manual attendance record timestamps and data.
- Click “Export” and choose the format you prefer. If you are not sure, export JSON for archive safety and CSV for reporting.
- Once selected, you’ll see export buttons or actions. You can export in multiple formats:
-
Save the files:
- Your browser will download one or more files (for example,
session-20250403-082227-session-1775305347532.jsonandsession-manual-attendance-records-20250403-082227-session-1775305347532.csv). - Save them to a folder where you keep meeting records.
- Your browser will download one or more files (for example,
-
Verify the files:
- Open the CSV in a spreadsheet app (Excel, Google Sheets, etc.) and verify it contains your participant data.
- Save the JSON as a backup (don’t need to open it, but keep it safe).
Next Steps
Section titled “Next Steps”You have now completed a basic end-to-end AttendFlow run.
- Go to First-Time Setup for the broader setup checklist.
- Go to Attendance Records for the day-to-day view.
- Go to Import and Export Attendance Records for format details and file naming.
- Go to Glossary to look up unfamiliar terms.
- Go to FAQ for answers to common questions.